
In the steps below, we will create a new region:
- North Sydney
- Priority is set to 5
- Not set up as a test region
- Automatic Check-ins are enabled
To create a new region:
- Click on Admin -> Zone Configuration -> Regions -> Create New Region.
You will then be presented with the new region menu
- Enter the Name of the region name under Name
- Set the Priority of the region in Priority
The priority level tells the system which rules to follow if the user is in a location where 2 or more regions overlap. The higher the number, the higher the priority level.
Example: Diana's organisation has a region around their whole campus (priority 0). Inside the campus is the Science & Research Facility (priority 1). Inside the Science & Research Facility is a volatile chemical lab that has a specific response team assigned to respond to alerts from that lab (priority 5) - To set the region up as a test region, tick the check-box for Test Region
Test Regions are areas where app users can test some of the app functions without messages going through to security or response teams.
Important: Only the First Aid (Green) and Help (Blue) buttons will provide feedback to the user that their test alert has come through. The Emergency (Red) button in the app overrides the region's test status and the alert will still go through to security and response teams. - To allow for the SafeZone app to automatically check-in when a user enters the region tick the box for Enable automatic check-ins. If it is un-checked, SafeZone app users can check-in to the region by manually pressing the Check-in button.
Note: SafeZone users will only auto check-in if they set their SafeZone App to Allow Automatic check-ins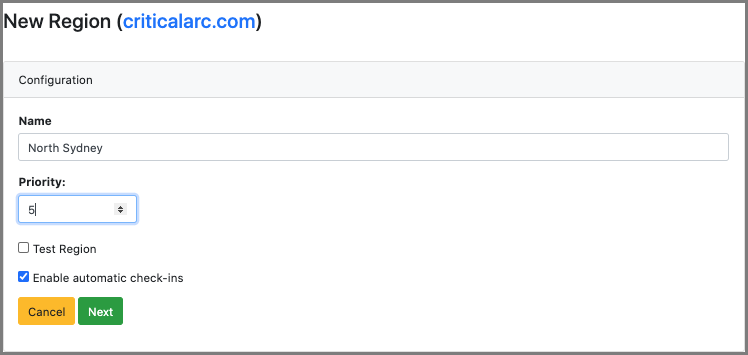
- Click on Next to define the region boundaries.
Defining region boundaries
After adding the new region, the interface will show a map that can be operated in the same way as you use Google Maps:
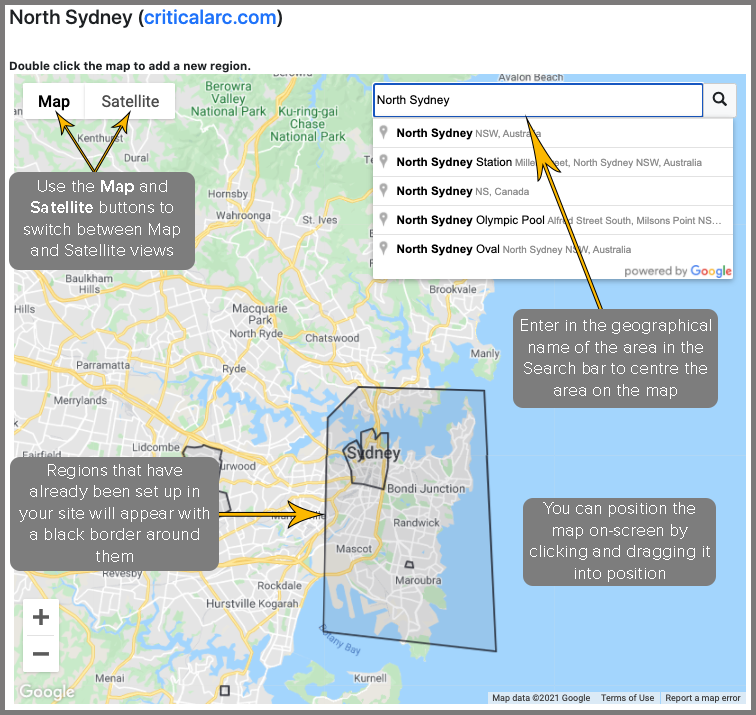
- Search for an area by tapping on the magnifying glass symbol in the top right and entering in the name of the area/suburb/region you wish to centre on;
- Zoom in and out using the + and – symbols at the bottom left of the map;
- Swap between “Map” and “Satellite” views using the buttons on the top left of the map;
- Move the map by single-clicking on the map, holding the button down, and dragging in the desired direction;
Using the Region Boundary Tool
After you have moved the map on screen and have scaled it to the right size, you can then add your region.
To add your region:
- Double-click on the map to display the Region Boundary tool. A blue square will appear on the map as shown in the image below:
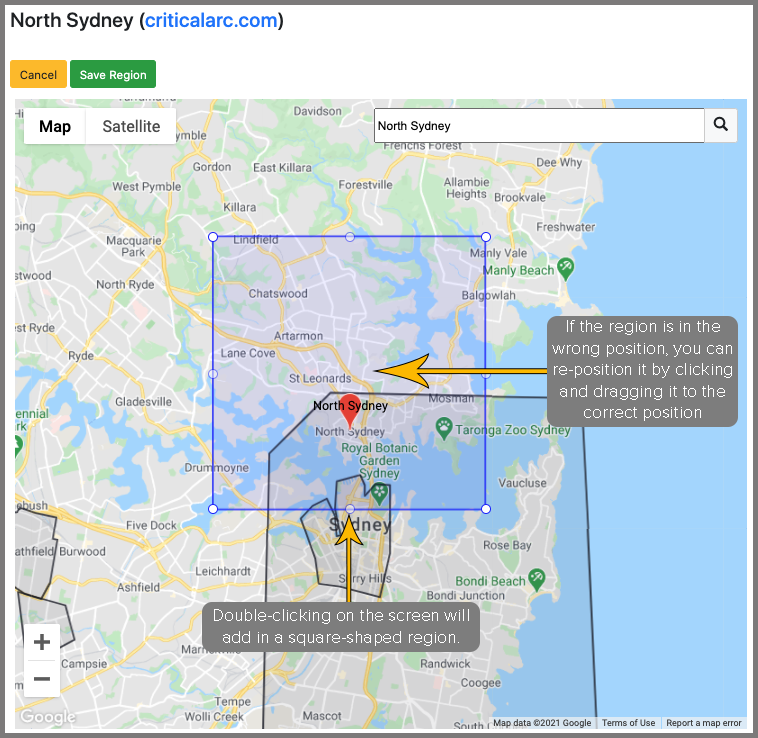
- A solid white dot will appear at each corner of the region - these solid dots allow you to adjust the boundary of the region. Click on the solid dots and drag to move the dot to a different area of the map. In the diagram below, the top right corner of the square is dragged south and east.
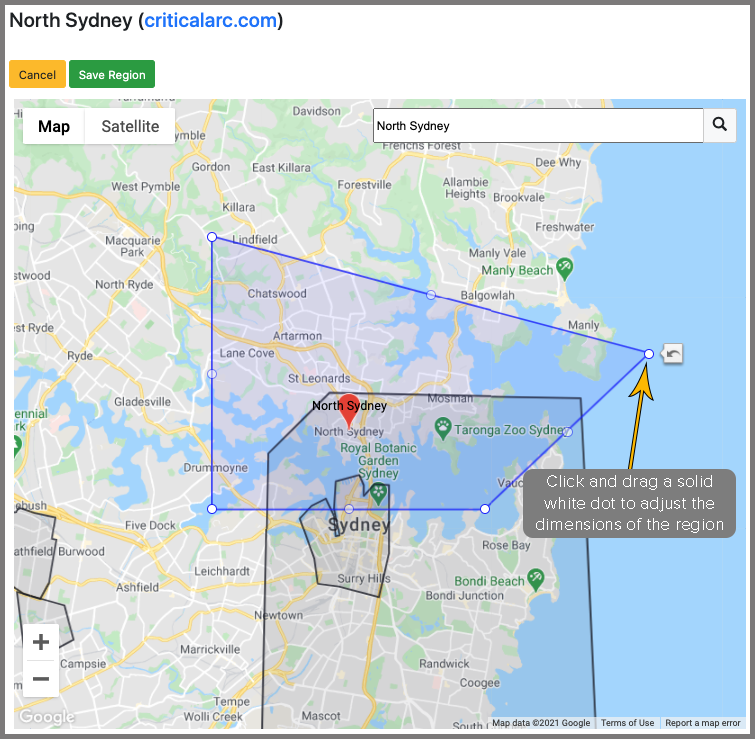
- For each blue edge that appears in your region, a faded white dot will appear at the halfway point. Clicking and dragging one of these faded dots will create a new edge between the original solid white dots.
In the diagram below, the faded dot between the top lines of the shape (from the diagram above), is dragged up to make a pentagonal shape.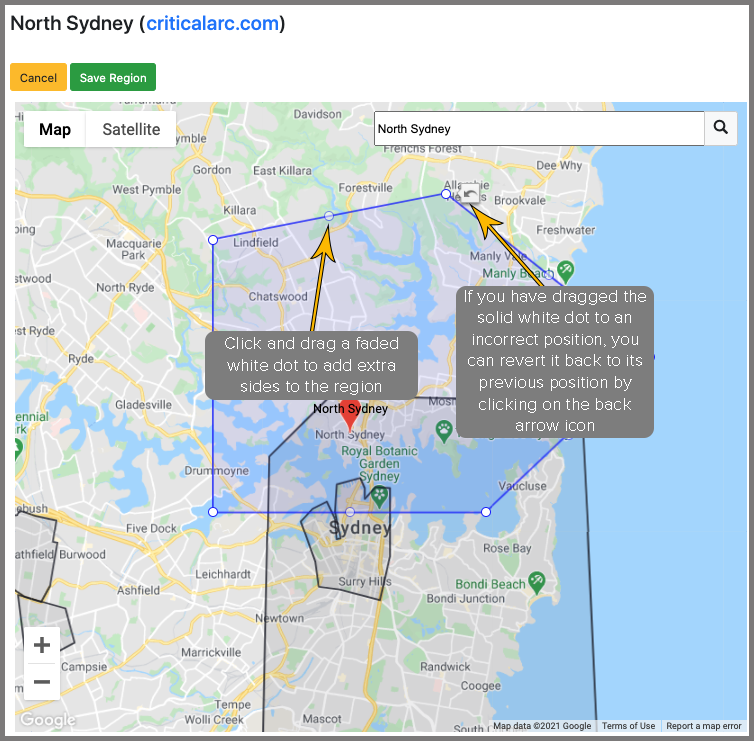
- To undo the last region change click on the back arrow which appears next to the dot you have just moved.
Important: Only 1 undo can be done at a time - You can delete other region points by right-clicking on the solid dots on the region boundary (it is not possible to delete the faded dots)
- Click on Save Region to save the region and move to the Region Editor page.
Comments
0 comments
Please sign in to leave a comment.