
This page covers the following topics:
- Viewing the User Groups list
- Searching and Filtering
- Creating a new user group
- Adding Supervisors
- Managing the User List
User groups allow you to put users into groups for:
- Sending notifications;
- Secondary responders (Fire Wardens, First Aid Officers - as defined by you/your organisation);
- Filtering groups on the Command Live screen through the Group Filter menu;
- Generating reports based on the user group(s);
- Checking for disconnections and sending out alerts if "Enable Disconnection Timeout Alert" is enabled in Global Settings - Check-In Settings
- Setting up workflows to trigger actions based on membership to a user group or sending notifications to the user group as part of the actions list.
- When configured as part of a Workflow Rule, Supervisors of a user group can be notified when certain events have triggered from SafeZone users
Viewing the user groups list
To view the User Groups:
- Click on Admin -> Users -> User Groups to go to the user groups page (the screenshot below is for illustration purposes only)

The list of user groups in your site will be displayed in alphabetical order however if you have user groups with a colour assigned to them, they will appear in alphabetical order at the top of the list.
The search bar at the top allows you to search for a user group using a partial word search.
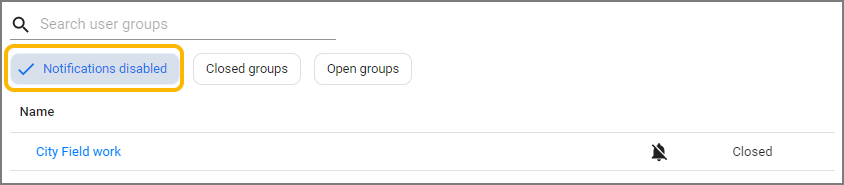
The filtering buttons allow you to filter groups that are
- Closed (only admins can add users to the group)
- Open (SafeZone users can opt-in and opt-out of the group
- Notifications Disabled (user groups that can't be sent notifications)
The status of the user groups is displayed on the right-side of the screen
Search and Filtering
Organisations may have multiple user groups in their system to represent their teams who may have:
- different responsibilities (Fire Wardens, Building Wardens, First Aid Officers)
- different security levels (Gold, Silver, Black)
- different geographic locations
- different messages they would like to send to different user group (eg a message to staff may be different to the message for students)
To search for a user group:
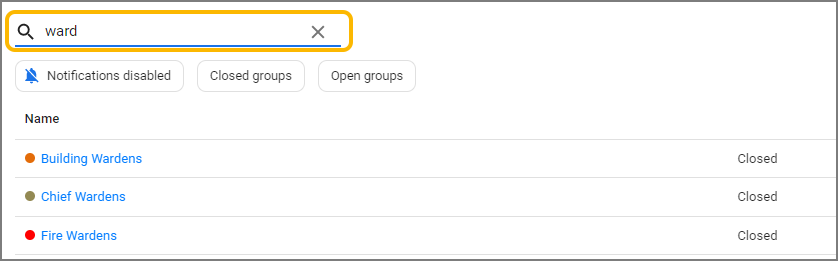
- Enter in the name of the user group you wish to filter. The search will provide results when partial words are entered (eg, typing in "ward" has filtered out user groups for the Wardens as per the screenshot below
The filter buttons can be used either on their own or in conjunction with the search bar at the top. By default the User Groups page will display all user groups in your site however you can filter by (for example)
- Open Groups
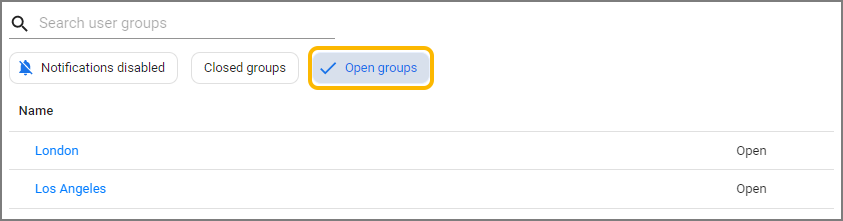
- Notifications Disabled
Creating a new user group
In the steps below, we will go through how to create a closed user group for Fire Wardens that has notifications enabled and a user group icon colour set to red.
To create a new user group:
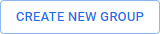
- Click on Create New Group.
- The New User Group page will appear
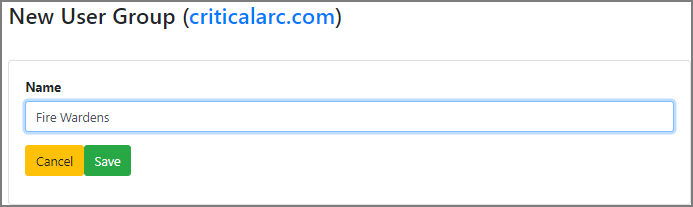
Enter the name of the user group you wish to create. - Click on Save to create the new group and go to the User Group editor page, otherwise click on Cancel.
By default, the user group you create will:- be a closed group;
- have notifications enabled;
- have no icon colour selected;
- have no users added to the group;
- have no Supervisors added to the group
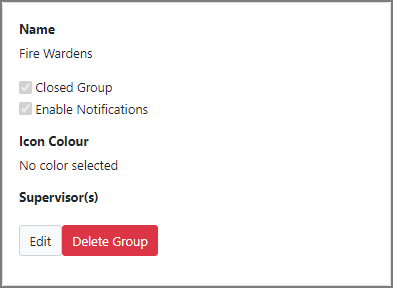
- To edit the group, click on Edit.
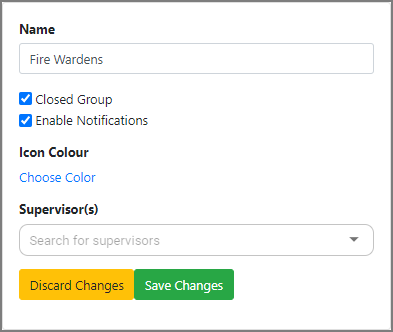
- If you need to edit the name of the group, change the group name in the Name field
- Select whether the group is to be a Closed or Open Group by ticking/un-ticking the checkbox for "Closed Group".
Closed Groups can only be administered by SafeZone administrators in the Command application. Example of this are Fire Wardens, First Aiders, or other groups which are not publicised to the general user base.
Open groups are shown to SafeZone users when they sign-up to the system. These groups could be used to notify users on non-urgent communications, e.g. Special Event Notifications or for users who may attend classes at different campuses. - If "Enable Notifications" is selected, the user group can have notifications sent to it through the Notify tab for communicating to users through the SafeZone app, email or SMS.
- To select an icon colour, click on Choose Color to bring up the colour palette
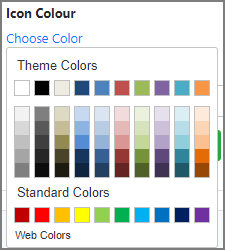
The Icon colour of the group is useful for viewing which users are members of the group on the Command Live screen. It will also display the group name in the Group Filter menu so Command users can filter our which user groups they need to view on the Live screen. A use case of this would be for a first aid alert - by tapping on Group Filter and selecting Fire Wardens from the drop-down menu. - Select a colour from the palette. You can choose from the Theme Colours, the Standard Colours or from the Web Colours by clicking on the Web Colors link.

In this instance, we have chosen red as the colour - To change the icon colour click on Change, to remove the icon colour completely click on Clear

On the Live screen, any users who have group memberships with a colour associated will have a "traffic light" next to their check-in icon. As per the screenshot below, the user is a member of the Fire Wardens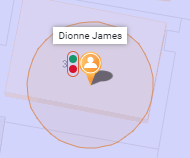
- Adding Supervisors is covered in the next section
- Once you have configured the user group, click on Save Changes to save your changes, otherwise click on Discard Changes to revert back to the previous settings.
Supervisors
Supervisors can be added to the group for people who are managing users in the user group. The Supervisors can be sent notifications through the Workflow Rules to be able to receive notifications on behalf of their users when actions have been triggered.
Example:
- An organisation has field workers out in the community who do community nursing with their patients.
- The nurses are instructed to enable the Check-In Timer for each household they visit.
- The Check-in Settings is configured to display a second check-in reminder notification 5 minutes before the timer expires
- When the second check-in reminder notification is displayed on the user's device a notification is also sent to the Supervisor informing them that their timer is about to expire
- The Supervisor can pro-actively contact the end-user or be prepared that the user's check-in timer will expire and an alert will be raised with the response team.
To add a supervisor to a user group:
- Click on the user group you want to add a supervisor to in the user group list to bring up the user group settings page
- In the User Group Settings click on Edit
- Under Supervisor(s) type in the name of the supervisor for the group. Partial word searches will start to filter out users who match the criteria
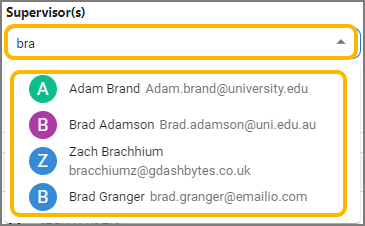
- Repeat step 3 if you need to add multiple supervisors to the user group
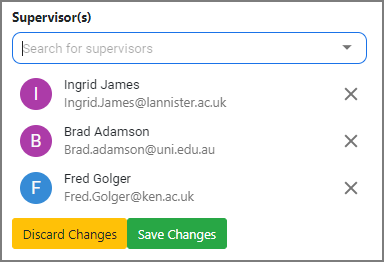
- Click on Save Changes to save your changes, otherwise click on Discard Changes to revert back to the previous settings.
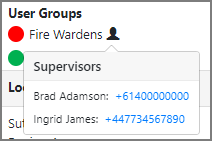
- On the Live Screen, when you click on a user in the Check-Ins or Alerts List, the User Groups section will display the Supervisors if you hover over the supervisor icon
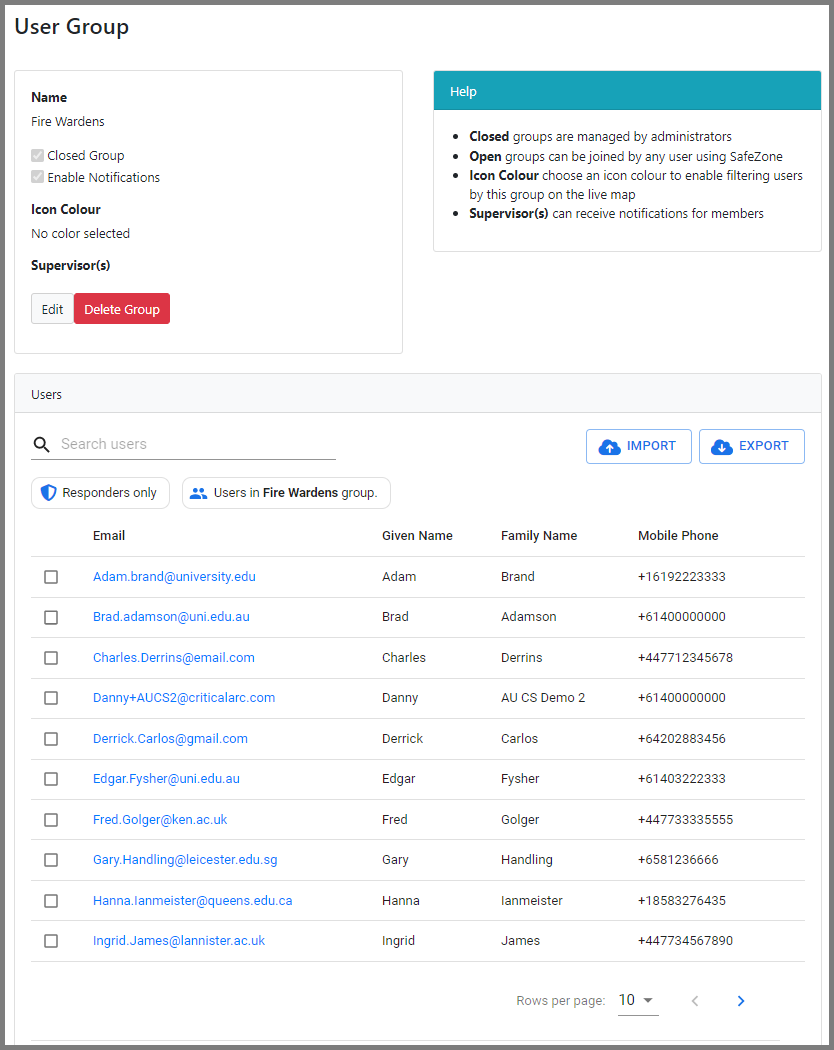
Managing the User List
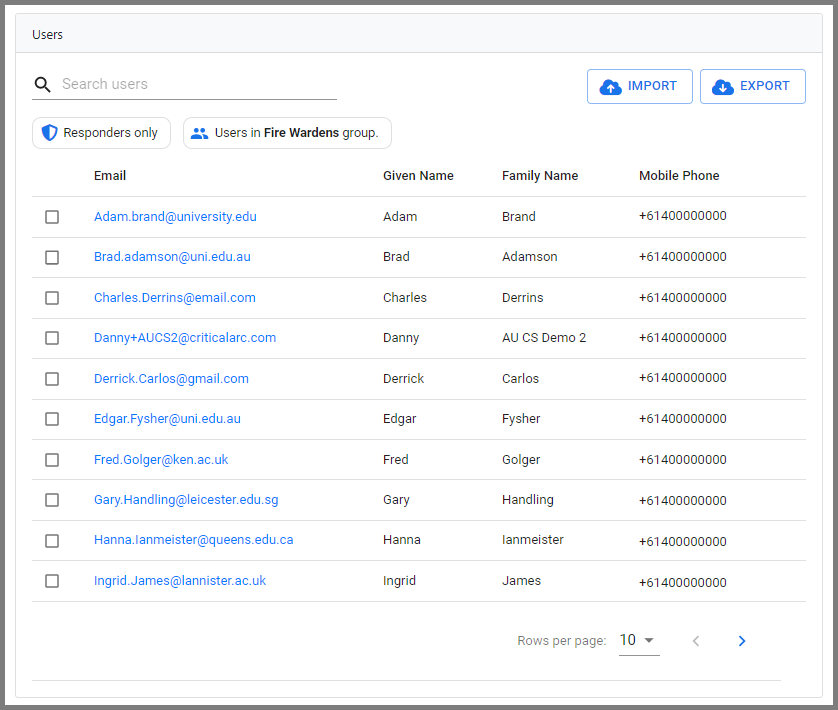
The User list works in a similar way to the User List menu with some minor changes.
Users who have membership to the group will have a tick in the check-box next to their name.
In the User Group editor page, you can:
- Search and filter users in the group
- modify users in the group;
- import a list of users to the group (only for Closed groups);
- export the user list
Searching and filtering users
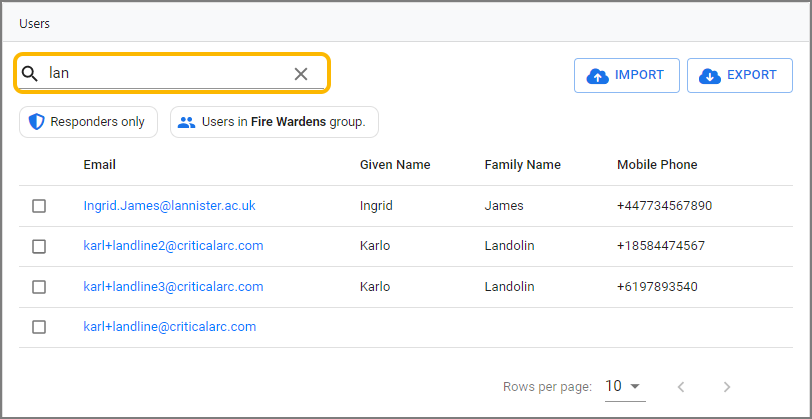
To search for users in the user list:
- Type in the name of the user you wish to search for in the search box. The search will provide results when partial words are entered.
The filter buttons can be used either on their own or in conjunction with the search bar at the top. By default, the User List will display all users in your site however you can filter by:
- Responders only
This filters out any users who have been given OmniGuard/Command access to SafeZone whether they are part of the group or not.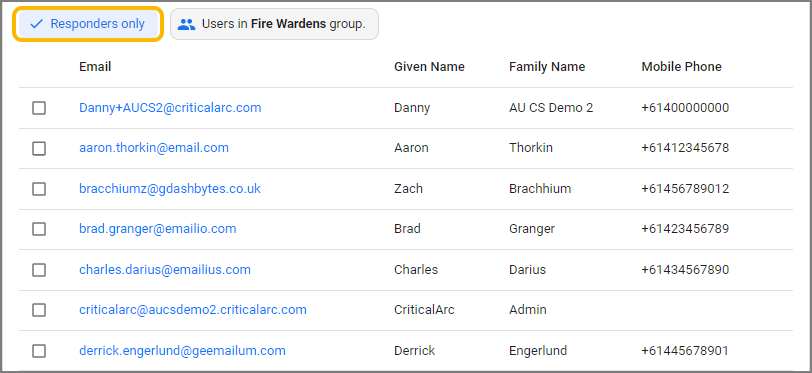
- Users in <user group name> group
This filter button will display the users who are members of the group.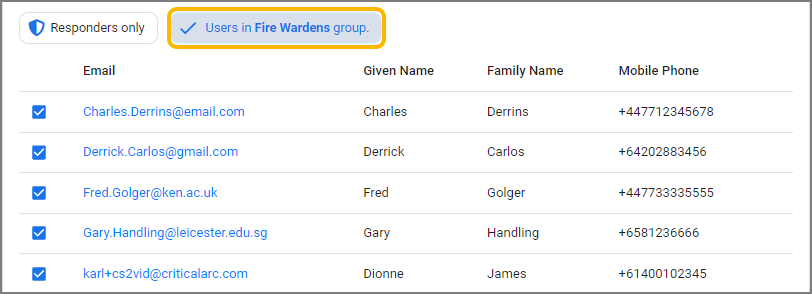
Modifying the user group
To modify the users in the group:
- To add/remove a user(s) to the group tick/untick the check-box next to the user's name.

- You can also click on the user's email address to bring up their user details editor page.
For instructions on how to edit a user's details, please see the guide on Editing a user's details
Import (only for Closed groups)
The User Group Import feature allows you to add multiple users to a user group who have already been added to SafeZone either by Registering a new user or by adding users through the Pre-Registrations feature.
To import an Excel spreadsheet of users:
- Click on Import to bring up the Import Group page.
Important: The spreadsheet must be in 2007 or later format (.xlsx) and the first column of the first worksheet must contain the email addresses for the users.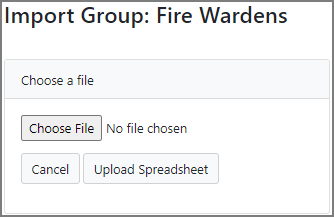
- Click on Choose file to select the Excel file from your computer.

- Click on Upload Spreadsheet to upload the spreadsheet.
- Command will process Excel spreadsheet to see if the users can be added to the group. It will inform you if a user is unable to be added to the user group if the user has not been added to SafeZone previously.

- If the users have not been added previously to the group, you can click on Add Selected Users to add the users.
- The Import feature can also be used to delete users from the user group. If you wanted to delete the users from the group using the spreadsheet, click on Remove Selected Users
- Click on Return To Group to return to the user group page.
Export
Exporting the user list allows you to save the user list in an Excel spreadsheet.
To export the user list:
- Click on Export
- The user list will download directly to your computer.
Comments
0 comments
Please sign in to leave a comment.